| Updated 17.10.22
Dynamically loading custom post types in WordPress
Asynchronously or dynamically loading content to the page in WordPress has traditionally been done using AJAX which unfortunately requires Jquery to work. If you were to google how to load I content in WordPress, 9 times out of 10 the tutorial would use AJAX.
When I was creating my template I didn’t want to include Jquery at all. so I searched and found scattered tutorials on how to achieve this with just vanilla javascript. After lots of trial and error, I managed to create a solid piece of code for my template that I’m happy to share with others.
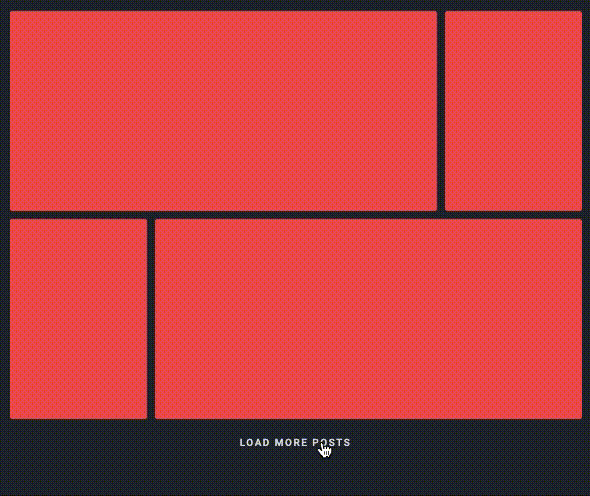
So here is my tutorial on how to dynamically load in custom post content to the page. The GIF above is an example of what we are going to achieve.
PHP
For this tutorial, I want to load my blog posts on click, so I first need to make sure that my custom post type is set to show_in_rest when it is first registered (find out more about custom post types). This makes the content available in WordPress’s REST API which is crucial for us to use the data. All of the PHP code can just be added to your functions.php or wherever you store your custom code in your template.
So for my blog post, it would look like this:
array(
  'the_type'           => 'blog-posts',
  'single'             => 'Blog post',
  'plural'             => 'Blog posts',
  'menu_icon'          => 'dashicons-format-aside',
  'taxonomies'         => array('category'),
  'rewrite'            => array('slug' => 'blog'),
  'show_in_rest'       => true,
  'publicly_queryable' => true,
  'public'             => true,
  'show_menu'          => true,
  'supports'           => array('title', 'thumbnail', 'excerpt',
'page-attributes', 'comments', 'editor', 'author', 'revisions')
),
Next up, we need to add some code that will be used to store the values from the custom post type into some easy to read JSON data.
If you look at the function below, we are creating an array that we can then use to loop through all of the blog posts and extract any data that we wish to use later on. At the end of the function, the newly created array of data is returned, ready to be used.
function get_blog_post_type($request) {
  $posts_data = array();
  $paged = $request->get_param('page');
  $paged = (isset($paged) || !(empty($paged))) ? $paged : 1;
  $blogPosts = get_posts(
    array(
      'post_type'       => 'blog-posts',
      'status'          => 'published',
      'posts_per_page'  => -1,
      'orderby'         => 'post_date',
      'order'           => 'DESC',
      'paged'           => $paged
    )
  );
  foreach ($blogPosts as $post) {
    $id = $post->ID;
    $post_thumbnail = (has_post_thumbnail($id)) ? get_the_post_thumbnail_url($id) : null;
    $posts_data[] = (object)array(
      'id' => $id,
      'slug' => $post->post_name,
      'type' => $post->post_type,
      'title' => $post->post_title,
      'featured_img_src' => $post_thumbnail,
      'url' => get_permalink($id),
      'excerpt' => mb_strimwidth(get_the_excerpt($id), 0, 180, '...'),
    );
  }
  return $posts_data;
}
Next, we need to register our path to this newly created data, using the GET method like so:
add_action('rest_api_init', 'get_custom_post_types_api');
function get_custom_post_types_api() {
  register_rest_route('blog-posts', '/all-posts', array(
    'methods' => 'GET',
    'callback' => 'get_blog_post_type'
  ));
}
This basically gives a place for our newly created JSON data to sit waiting for us at this URL route /wp-json/blog-posts/all-posts to use.
Finally, just add the button wherever you need it within your template. Something like this will be enough:
<button class="load-more"> Load more blog posts </button>JS
First, let’s set up some variables, one for our button, one to set an initial count to 0 and one to define how many posts were initially shown on the page – this will of course depend on your design. Then we create a function that we will use later on to show or hide the button, as well a simple function to split an array up into chunks for us. Finally, I define the itemsContainer variable which will be used to push our HTML to later.
function chunkArray(array, size) {
  const chunkyArr = [];
  let index = 0;
  while (index < array.length) {
    chunkyArr.push(array.slice(index, size + index));
    index += size;
  }
  return chunkyArr;
}
function loadButton(modifier) {
  if (modifier === "hide") if (button) button.style.display = "none";
  if (modifier === "show") if (button) button.style.display = "block";
}
const itemsContainer = document.querySelector(".cb-articles-grid__items");
const postsShown = 4;
let count = 0;
const button = document.querySelector(".load-more");
Next, we need to add an event listener to our button so we can then trigger the code to fetch the data, generate the new blog posts and then add them to the screen.
To get the data we created before, we will use the native Fetch API which will allow us to asynchronously get our data.
button.addEventListener("click", () => {
  fetch(`/wp-json/blog-posts/all-posts`)
    .then((response) => response.json())
    .then((data) => {
      // NEXT JS CODE WILL GO HERE
    })
    .catch((err) => {
      console.log("Something went wrong!", err);
    });
});
Hopefully, the above bit of code should be fairly easy to understand, we are simply telling Fetch to go to our URL to retrieve our data. If this works, it will be returned to us as a response which we then just use the json() method to parse our data.
If that all works with no errors, it will enter the next .then block for us to use the data how we please. However, if there are any errors, the .catch block can be used to let you know that something went wrong.
The next bit of code is going to be added within the second .then block from the code above.
data.splice(0, postsShown);
const newData = chunkArray(data, postsShown);
const currentChunk = newData[count];

if (count <= newData.length) {
  const items = [];
  currentChunk.forEach((key, index) => {
    const postUrl = currentChunk[index].url;
    const postTitle = currentChunk[index].title;
    const postExcerpt = currentChunk[index].excerpt;
    const postImg = currentChunk[index].featured_img_src;
    const postDate = currentChunk[index].date;
    const article = `<article class="c-article-item fadeIn">
      <a class="c-article-item__link" href="${postUrl}">
        <div class="c-article-item__image">
          <img src="${postImg}" alt="${postTitle}">
        </div>
        <p class="c-article-item__date">${postDate}</p>
        <div class="c-article-item__text">
          <h3 class="c-article-item__title">${postTitle}</h3>
          <p class="c-article-item__excerpt">${postExcerpt}</p>
        </div>
      </a></article>`;
    items.push(article);
  });

  itemsContainer.insertAdjacentHTML("beforeend", items.join(""));
  count++;
  if (count === newData.length) loadButton("hide");
} else {
  loadButton("hide");
}
First, on line 1, we need to remove the initial posts that are already appearing on the page, we do this by using the splice javascript method.
Just after that, we use our chunkArray function to split the remaining data into chunks of the same size or less if there is an odd number. You can change the amount that you wish to chunk your data, it will depend on how many you want to print to the screen at a time. Then we simply define a new variable to store the chunk of data we’re about to use next, depending on the count variable we set up initially.
Next, we set up an if statement to ensure we only run our code while there is data to do so, then inside that we create an items variable that we will use later. If we don’t have enough data, the else will trigger and hide our button.
On line 7 we are going to loop through our currentChunk variable to extract the data we need, and then push it all to our items variable we just created. I used template literals here because it makes it so much nicer to read, learn more about this feature of JS here.
After pushing our new article, we just need to add it to the page which we do on line 27 and then iterate our count variable by 1.
Finally, on line 29, we check to see if we need to hide our load more button because we’ve run out of data.

Thanks for checking out this tutorial, I hope it helped you. This code can be easily adapted so you load in the content on scroll, I may do a further tutorial on that in the future.
If you have any questions or feedback, please leave a comment below and I will get back to you.